Garden Prep Checklist: Things to Do in Spring

Gearing Up for Spring In the Garden Is an Exciting Time
We gardeners are filled with that familiar anticipatory feeling—eager to see our gardens come alive with beautiful blooms from spring bulbs, perennial flowers, roses, and shrubs and getting our faces back into the sunshine and our hands in the earth.
To help get your garden started right, we’ve drafted this 8-step game plan to whip your garden back into top shape by planting season.
1. Get Your Shed in Order
Go over your tools. Sharpen blades, oil hinges, and think about expanding or upgrading your collection. Use a mill file to sharpen blades, then add penetrating oil to remove and prevent corrosion. You would be surprised how much easier it is to dig or cut with a sharp, well-oiled implement; the right tools will make the whole season much easier!
You should also take this opportunity to replenish your supplies. Make sure you have enough fertilizer and soil amendments on hand. Replenish your supply of plant supports and pre-assemble any structures that you want to make for yourself. It is a lot easier to do get this work done in your shed while the weather is still icky than to have to worry about it later in spring when there is plenty of things you would rather be doing outside.
2. Clear Out Weeds
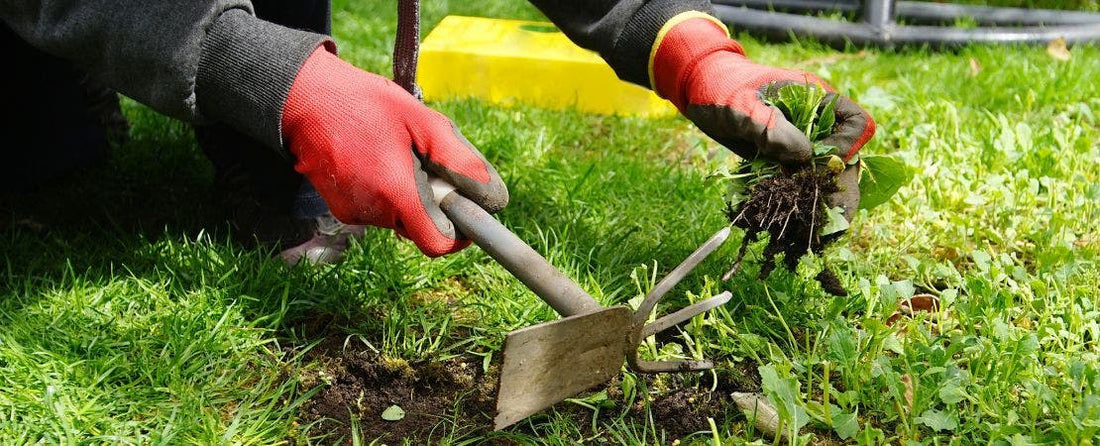
Remove weeds, mulch, and debris. Do a spring cleaning of the area, removing anything in the way until you are back to the bare soil. Dead organic matter can go on the compost pile to break down. Well-composted mulch or organic matter can stay right where it is to be incorporated into the soil, but “fresh” mulch needs to be raked away to expose the soil.
Check for weeds that might still be alive. These must be removed from the soil and placed in the middle of a working compost pile where the heat will kill them before any seeds can germinate. You don’t want to leave any living weeds around to compete with your garden plants.
3. Prune
Many trees or shrubs can use a good pruning this time of year, especially those that bloom on new wood. Late winter/early spring is the perfect time to prune back old wood because you can see the branch structure well and you can shape the plant before the buds break dormancy and the plant starts investing energy in its branches. Some of the plants you want to prune at this time of year are: Buddleia (butterfly bush), Cornus Canadensis (flowering dogwood), Lonicera (honeysuckle), Hydrangea paniculata, Cercis (redbud), summer-blooming spirea, Lagerstroemia (crepe myrtle), roses, and wisteria. Early spring is also the perfect time to prune and shape woody ornamentals.
Use a clean rag and isopropyl alcohol to sterilize your pruners before each cut. This precaution keeps you from inadvertently spreading plant disease around the garden. Secondly, there are many plants that you should NOT prune at this time of year because they bloom on old wood. Plants that you should wait until after the bloom season to prune include spring-blooming spirea, camellia, rhododendron, azalea, forsythia, Hydrangea Macrophylla (bigleaf hydrangea), syringa (lilac), magnolia, kalmia (mountain laurel), and weigela.
Whenever you prune your plants, it is a good practice to add a little fertilizer to the soil to ensure that the plant has ample nutrients on hand to heal its wounds quickly.
4. Prepare the Soil
Once the frost has lifted and the soil is workable, start preparing your garden beds. In winter, soil tends to become compacted, so the first thing you want to do is loosen it back up by tilling or turning it. Using a tiller or a sharp spade, work the soil to a depth of 12 to 14 inches to loosen it up. Any mulch or leaf litter that is well-composted should be mixed right in, but if it is too fresh, you should remove it first. Call your local 811 before you dig to avoid damaging underground utilities.
Next add compost and amendments. A soil test will gauge your garden soil’s pH and nutrient levels which will tell you what type of materials you might want to add. If you have poor or clay-based soil, it is especially important to add a healthy layer of compost to improve the soil’s texture, nutrient content, and moisture-retention. Then rake the soil level and water it lightly to help it settle and release air pockets.
If your existing soil is particularly poor, the easiest option might just be to rise above it with a raised garden bed.
5. Determine Your Growing Space and Plant Needs
Set up new planters and garden beds. Order beautiful and unusual cultivars and new varieties you come across in catalogs. Evaluate the condition of existing gardens, amend garden soil as needed, install shepherds hooks and window boxes, and order new pots to ensure that you have plenty of garden real estate to showcase your gorgeous, new plants.
6. Divide Perennials
Divide perennials like daylilies. Some perennials tend to crowd each other out, causing their performance to deteriorate year over year. Daylilies, Shasta daisies, hostas, and many others all benefit from being divided in early spring. Before the growing season takes off, give these plants room to spread out by following these simple steps for dividing select perennials:
STEP 1: Carefully dig around the perimeter of the clump, giving a wide berth so as not to damage the roots.
STEP 2: Dig under the plant root ball and gently lift it out of the ground.
STEP 3: Try to disentangle the roots by hand and pull apart the distinct root stocks/tubers. In some places it will be necessary to cut the clump apart with a knife.
STEP 4: Evenly space the new divisions over a larger area and re-plant them immediately. This will improve the bloom show of these perennials, and it is an economical and easy way to propagate a larger collection! You can give divided clumps to friends and family to plant in their gardens too.
Note: If your clump of perennials is too large to pull out of the ground, you may have to divide them while they are still in the ground by inserting two garden forks back-to-back into the middle of the clump and carefully pushing them apart, then lifting out the divisions for re-planting.
7. Early Planting
Get the first wave of planting done. Many plants can be started indoors this time of year to get a head start on the spring growing season. Particularly hardy vegetables (onions, potatoes, artichokes, and some lettuce) may be ready to plant sooner that you expect. Refer to the specific plant information for your growing Zone.
Bulbs and perennials are easy to plant—it’s really just dig, drop, done! Dig the hole to the proper depth, space the holes according to the guidelines, add soil amendments as necessary, add the bulb/root ball and be sure that the crown is right at soil level, then fill in the hole and water thoroughly.
With Trees and Shrubs, here is a tip to help those roots settle in to their new home: the moat method. Again you should dig a hole plenty large and wide enough to accommodate the plant’s roots, and add a cone of amended soil for the roots to rest on, then fill in the hole with more amended soil.
But before you water in, create a ring of soil around the plant a bit wider than the original hole. This ring will act like a berm while you water the plant in, allowing you to really get the deep saturation necessary without turning the whole area into a mud pit. See the diagram for details.

8. Apply Mulch
Lastly, apply a generous layer of mulch wherever you can. Mulch is effective at keeping weeds from becoming established if you have it in place before the weeds begin sprouting.
Depending on your location, you may need to wait to plant your outdoor garden, but a little pre-planning can stoke your enthusiasm. Remember in colder climates to wait for a series of 50-degree F days before deeply clearing winter’s organic matter. Pollinators will have time to awaken after a consistent handful of days with warm weather.


